Can we build our own EEG caps? Yes, we can!
We order the "surgical" cap style "blanks" from Cortech Solutions.This tiny bit of fabric costs upwards of $300.
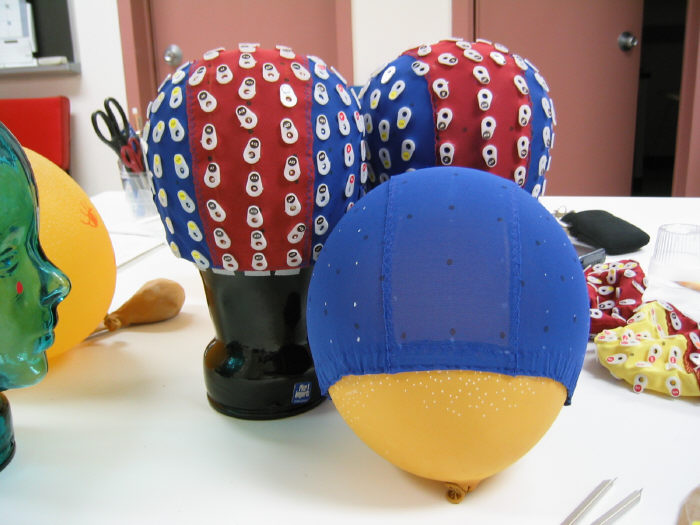
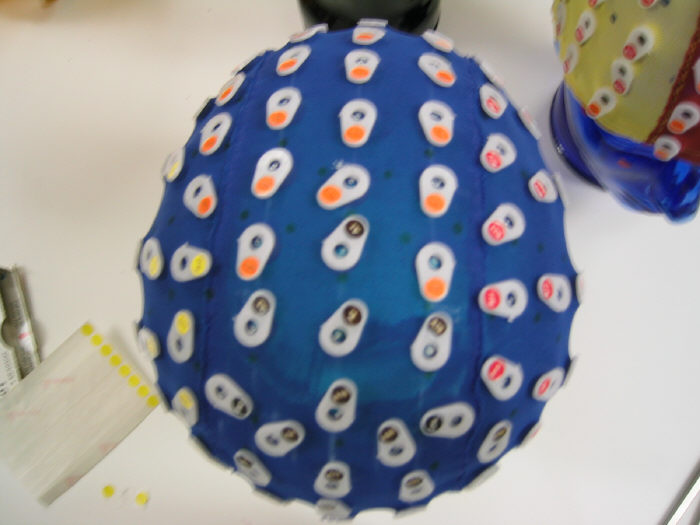
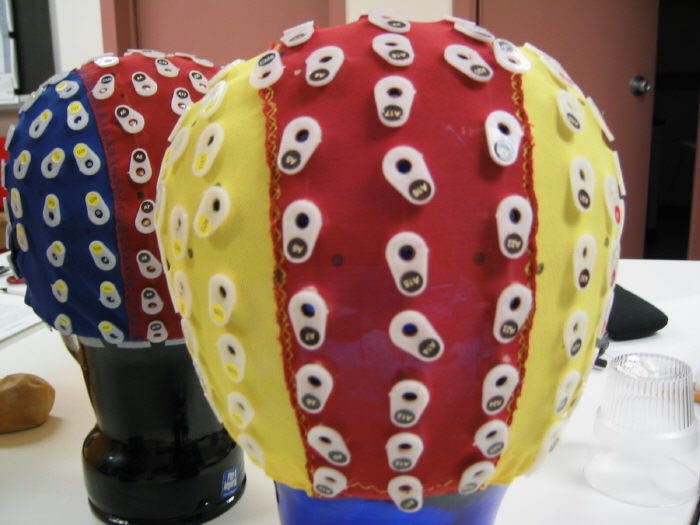
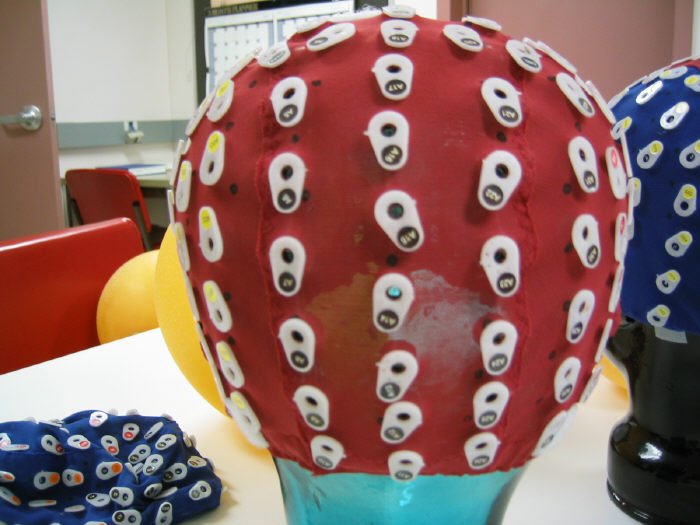
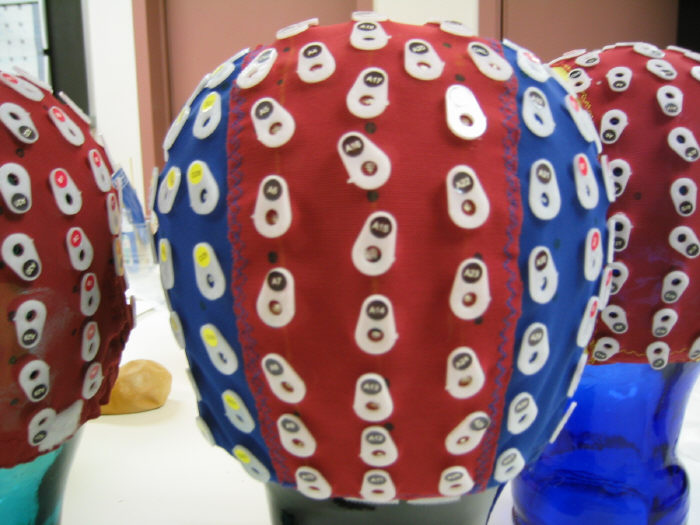
Note the cap sizes: The colours are a key.
Small: yellow (50-54 cm)
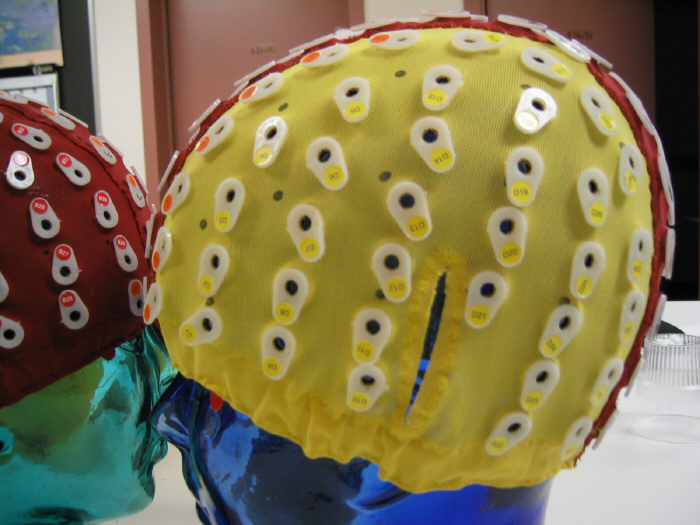
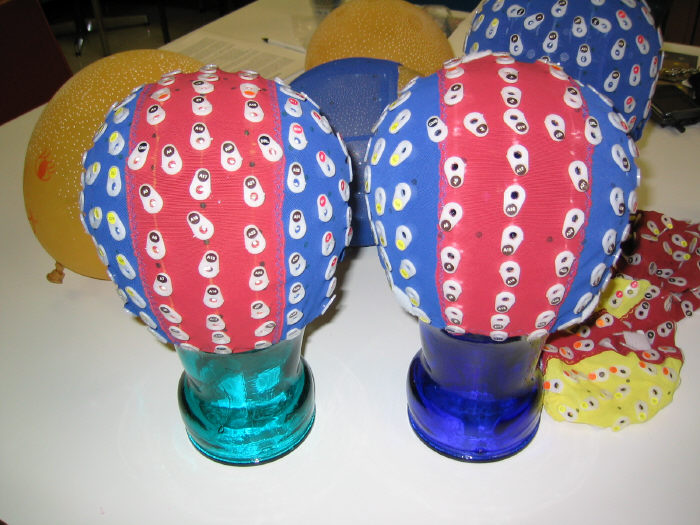
Medium/Small: yellow side panels with red middle panel (52-56 cm)
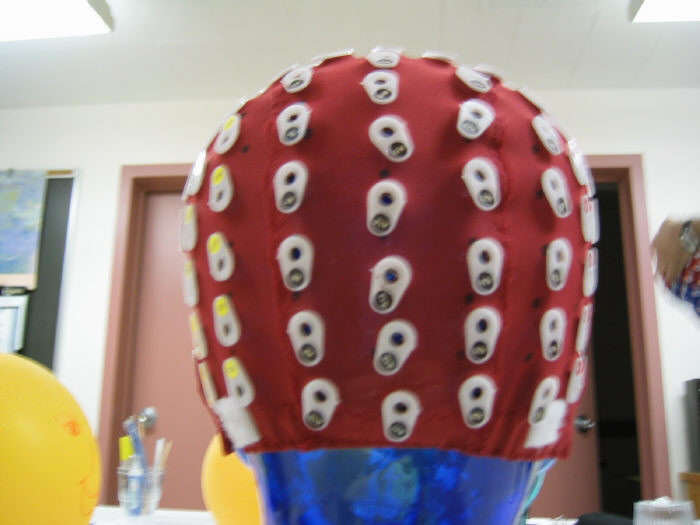
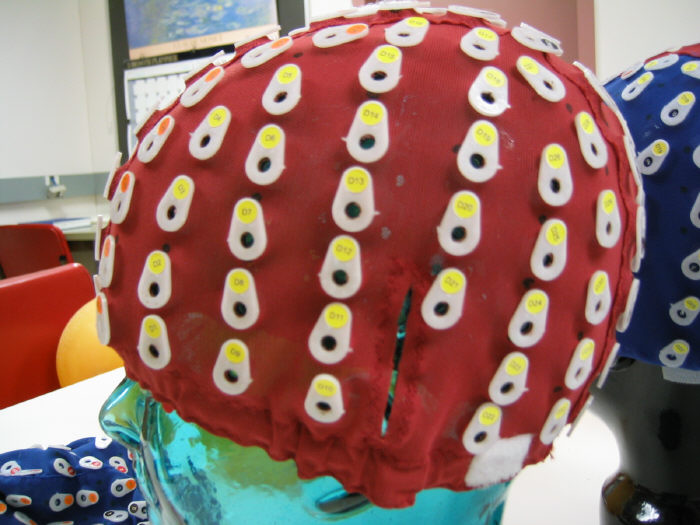
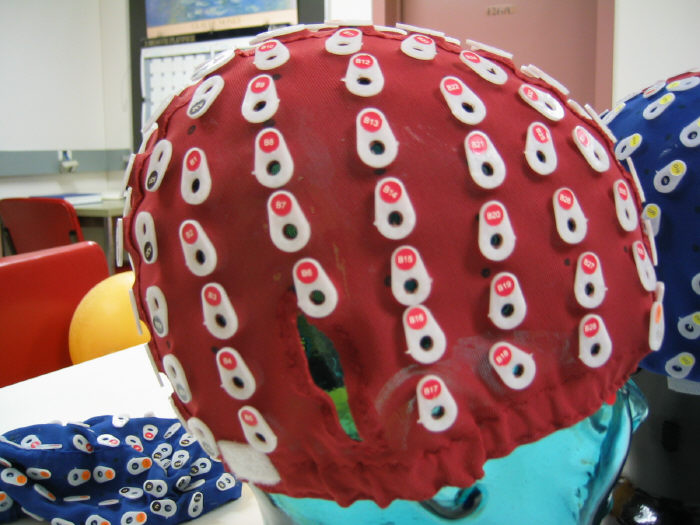
Medium: red (54-58 cm)
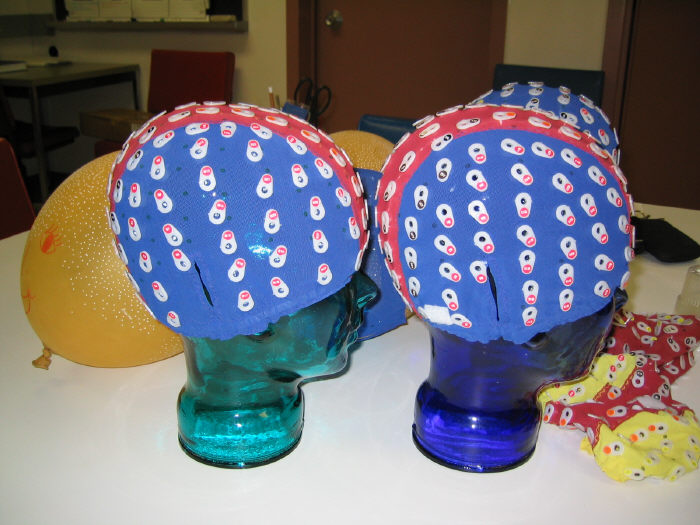
Large/Medium: blue side panels with red middle panel (56-60 cm)
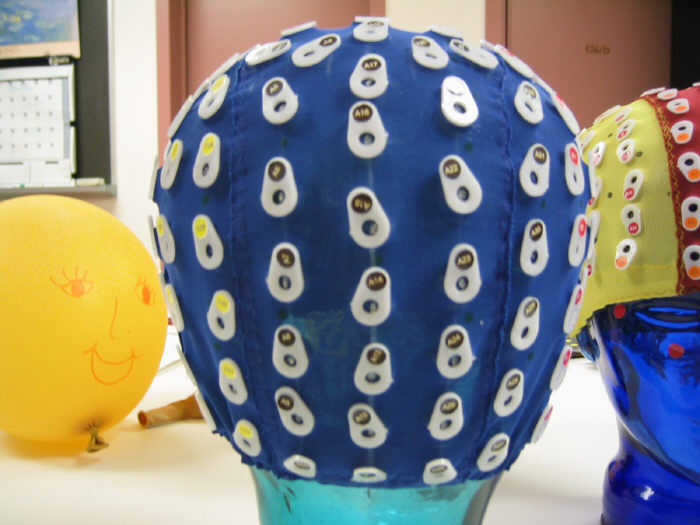
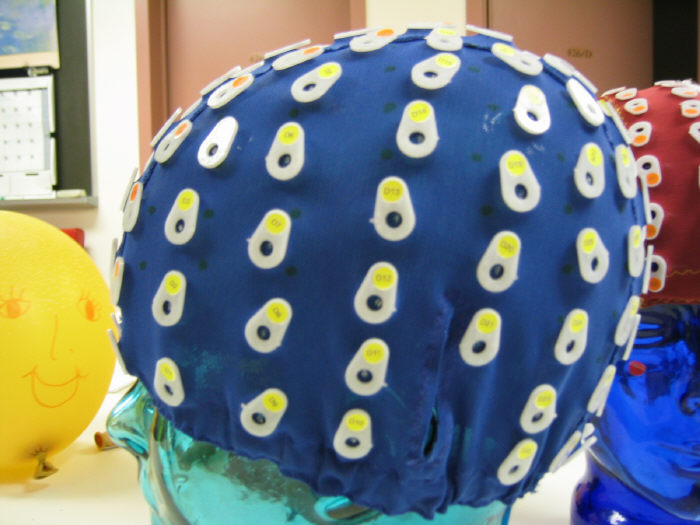
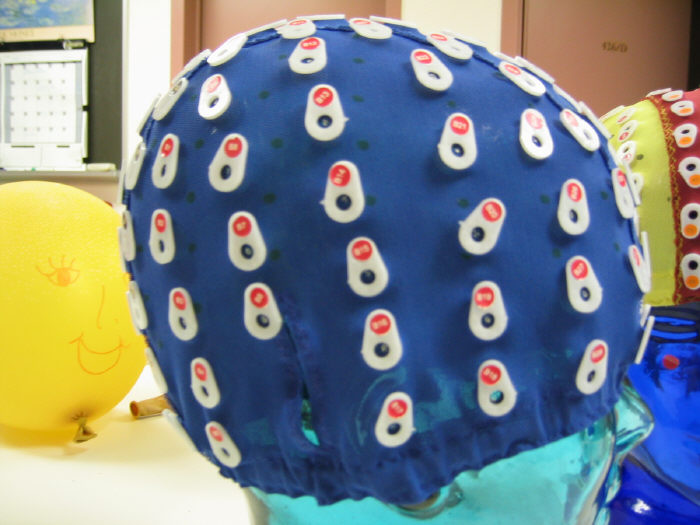
Large: blue (58-62 cm)
X-Large: brown (62-66 cm)
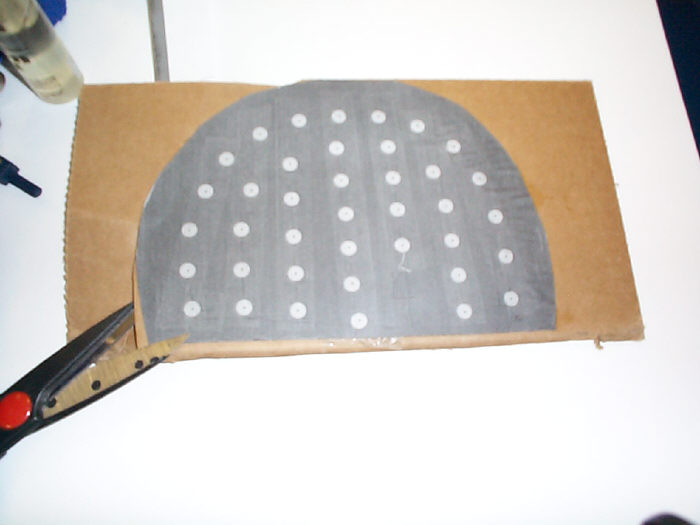
After giving up on the asymmetric glass head, we made a flat cardboard template for the left side panel of the cap. Locations were carefully mapped out. Each location was marked with an adhesive yellow dot.
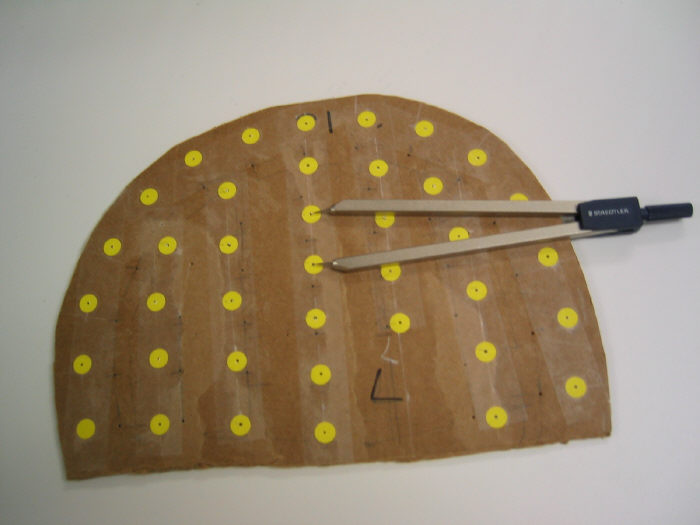
We then stuck a pin through the centre of each dot to create a mirror image of the locations on the other side of the template for the right side panel. These locations were also marked with a yellow dot. Transparent tape across all the dots made sure they would not fall off.
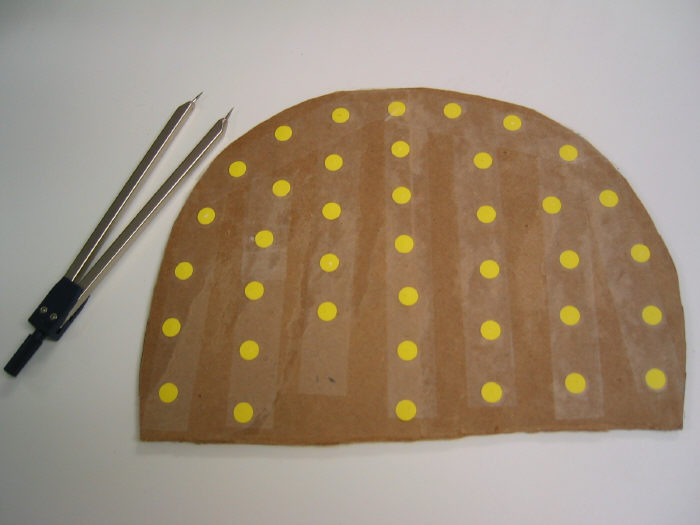
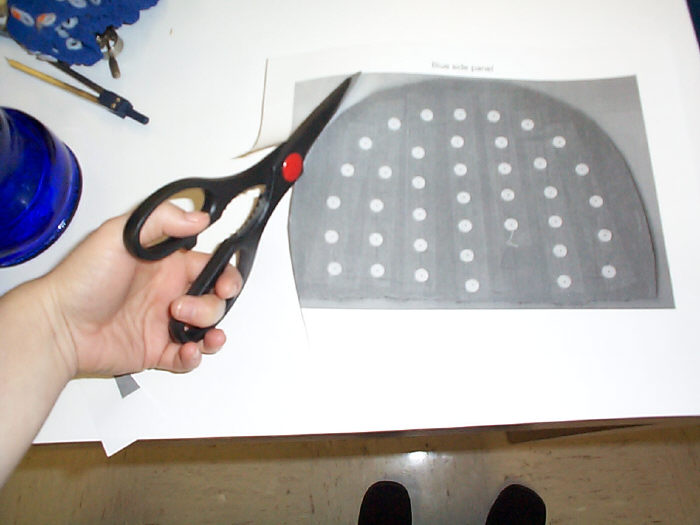
The original cardboard template was designed for the blue side panel (medium-large and large sizes). We scanned it and placed it in a powerpoint file, then resized it at 90% (yellow), 95% (red) and 105% (extra large brown). We printed these different sizes and created cardboard templates for each size side panel. The powerpoint template file is here. We might want to redo the templates and improve the fit. The blue one works well, but the others are a bit off.
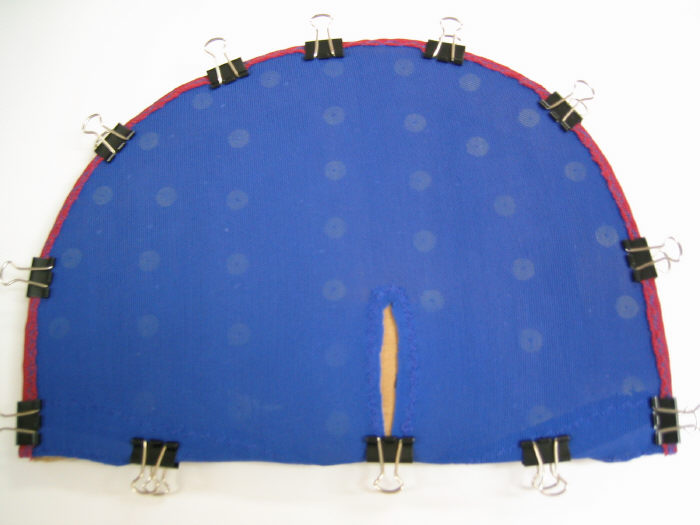
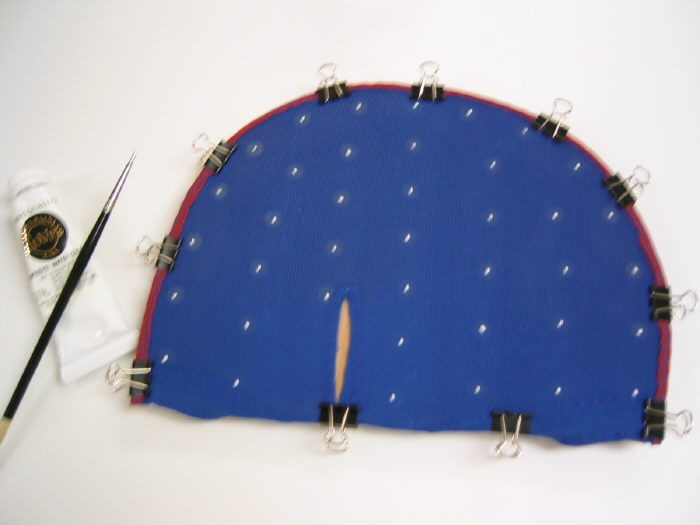
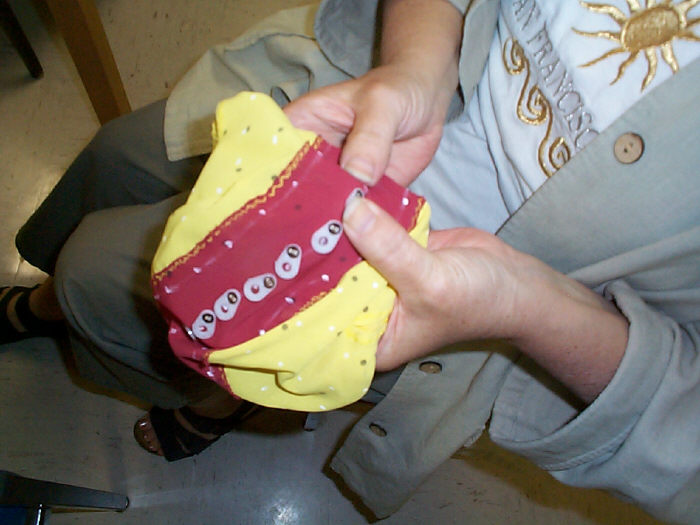
Using small binder clips, fasten the left side panel of the cap carefully around the template so that the seam forms a border around the inside edge. Click on any of the photos to see a larger size. The bottom seam at the location of the ear slit is folded entirely under the cardboard so that the bottom seams curve up slightly from that location to the front and back edges.
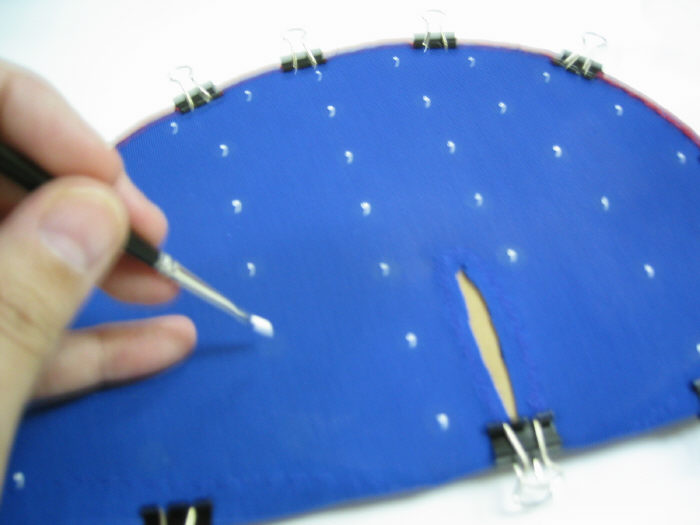
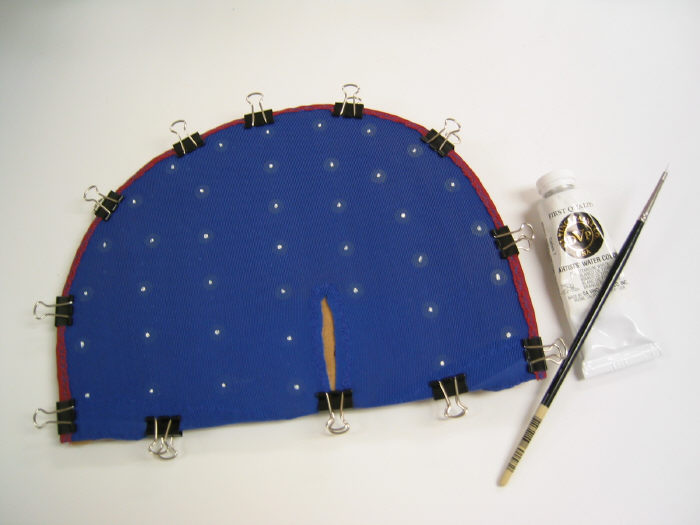
You can see the yellow dots through the fabric. Using a tiny paintbrush and white watercolor paint, make a small dot in the middle of each yellow dot to mark the locations. Alternatively, you can use a marker - but be aware that it is sometimes necessary to move the position of the dots.
Turn the template over and repeat for the right side panel. NOTE: With the older fabric, you might notice that the ear slits are not in exactly the same place on the left and right sides -- this would be an error in cutting and sewing these caps -- not our fault! But we have to accommodate for it.
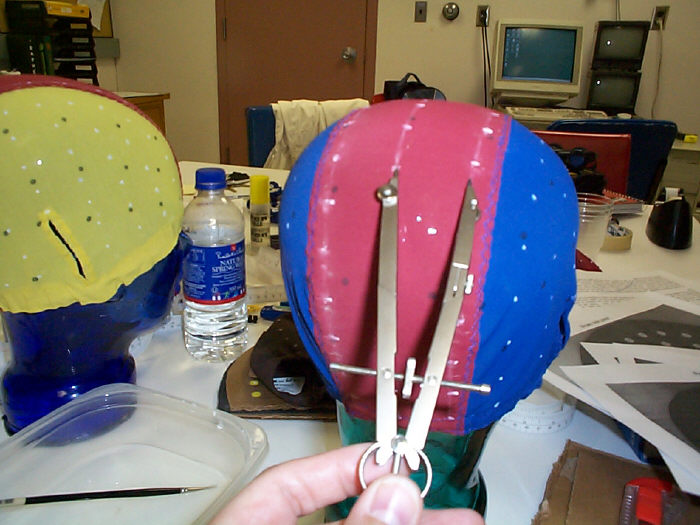
Now it is time to mark the middle 3 rows which span the cap from front to back down the middle panel. We used the glass head for this at first (as you can see in some of the photos), but eventually we decided that balloons were the way to go because the glass head is not symmetric. Purchase thick balloons so they don't break too easily. Blow up the balloon so that the cap is not too stretched. You might try placing the cap on the balloon and blow it up inside the cap for the perfect fit. Make sure the cap is equally stretched across the balloon and seams are straight.
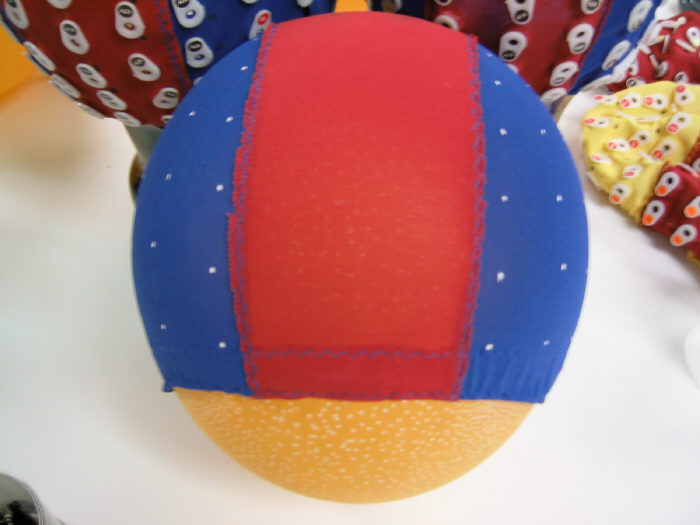
Starting at the front or back seam, divide the distance between electrode locations on either side of the middle panel into quarters (see photo below). This marks the location of the three middle rows. Do this for each location from front to back because the width of the middle panel varies.
Shown on the glass head in the above photo, but do it on the balloon instead.
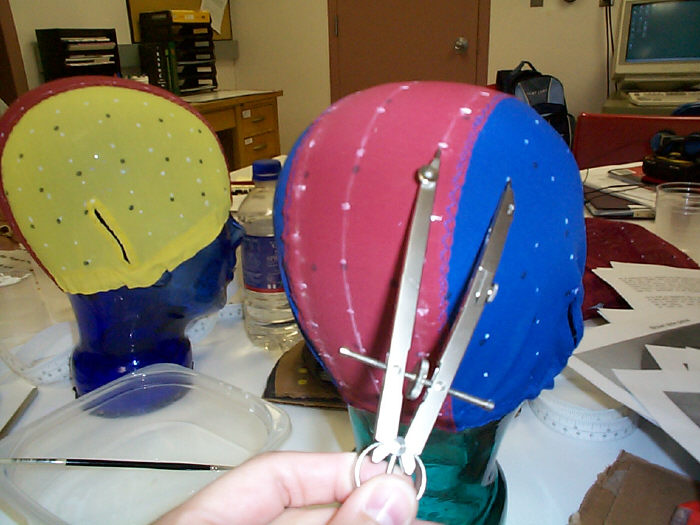
Note the distance between these two electrodes (photo above) should be the same as the distance between the centre and lateral lines (photo below). Make sure the distances are correct.
Now, measure for location of electrodes along these 3 new rows.
While measuring (and before making the watercolor or marker dots) we used a sharp white chalk pencil and a protractor.There are 18 electrodes along the middle row. Determine location of electrode just above the front seam, and location of electrode just above the back seam. Measure distance from front to back electrode along the line and divide by 17 to get electrode spacing.
There are 16 electrodes on the two rows on either side of the middle row. Determine location of electrode just above the front seam, and location of electrode just above the back seam. Measure distance from front to back electrode along the line and divide by 15 to get electrode spacing.
To help with measuring, you can calculate the distances along the measuring tape. For example, if there are 18 electrodes, there are 17 spaces between them. Total distance / 17 = spacing. 0 + spacing = 1st location along the tape measure. 1st location + spacing = 2nd location. 2nd location + spacing = 3rd location. With these numbers, you can lay the measuring tape along the line, and easily mark off the locations. For ease of calculation, use a spreadsheet like this. Here's another spreadsheet that we used to measure middle rows in January 2015.
Shown on the glass head, but do it on the balloon instead.
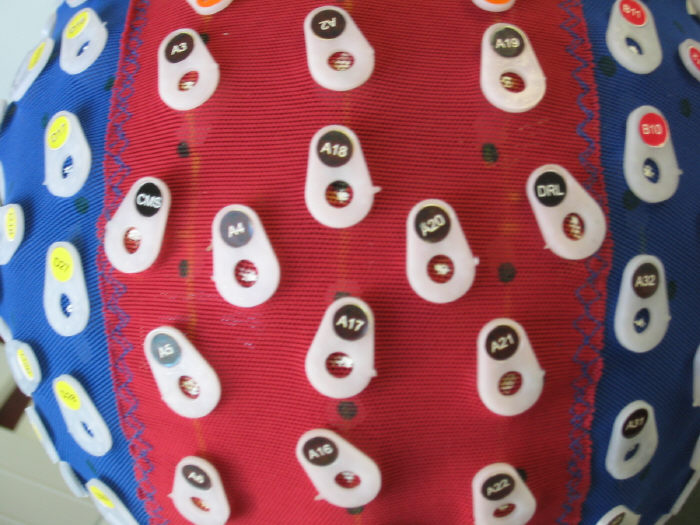
Marking the CMS and DRL sites:
When you have the locations marked, find the position of the A4 and A20 electrodes. An excel file is available showing electrode labels (in excel version and in PDF version).Measure the distance between the middle and adjacent line. Shift A4 and A20 toward the middle by 1/3 that distance, and shift them toward the back of the head just a little so that the vertical alignment is 1/2 way between A18 and A17. Place CMS lateral to where A4 was before you moved it, the same 1/3 of the distance. Vertical alignment of CMS should be 1/2 way between D17 and D27. Place DRL lateral to where A20 was before you moved it, the same 1/3 of the distance. Vertical alignment of DRL should be 1/2 way between B10 and A32. The photo should help make this more clear.
Note that when looking at the photos of the electrode holders, the label tabs can be misleading -- make sure you are judging distances between the holes (and not the tabs).
Snapping on the electrode holders:
When all locations have been marked with a dot of white watercolor paint (or other kind of marker), you are ready to snap on the electrode holders. Careful with them, they cost $10 each (yes, no kidding).The old electrode holders come in 3 parts (black ring, bottom donut, top tab). The newer ones come with the black ring already placed. Place the ring inside the donut (if it is not there already).
The donut of the holder goes inside the cap; try to centre the dot in the middle of the circular donut part, then looking at the outside of the cap, poke ALL the prongs through the fabric -- this can be challenging.
Then snap on the tab -- this is challenging as well -- to line up the tiny holes in the tab with the prongs. Snap on the tab the right way up, tab pointing toward the top of the head, so that it is easy to see and read the labels when applying the electrodes (see series of photos below showing good and bad tab placement).
At this point (placing the holders) you have a last chance to fudge the locations just a tiny bit, if any dots got misplaced.
If you are recycling the old electrode holders (from stretched out caps), we highly recommend you do it in an organized way. Don't remove all the holders from the old cap all at the same time. Remove one, then place it on the new cap. Or, remove just a few, and place them before removing more. ALSO note: if recycling holders or if you have to move a holder, the tab has to be pulled off VERY carefully, otherwise the tiny prongs might break off. Don't pull up by the tab, and don't pull it off at an angle (too much torque); instead, get fingernails between the tab and the bottom donut and slowly work them apart all the way around so that the tab comes straight off. I know this is a pain, but $10 each.
Applying labels: for new holders, the labels might not yet be applied. Note that once the labels are stuck on they cannot be removed.
Note in the photo above that the tabs are NOT pointing toward the top of the head - bad example! Don't do this. See below for better placement.
Burning the holes through the cap
When you are finished snapping on all the holders and placing all the labels, you can burn the holes using a soldering iron. It doesn't take much, be careful not to melt the holders!Need a photo for this!
More photos of completed caps:
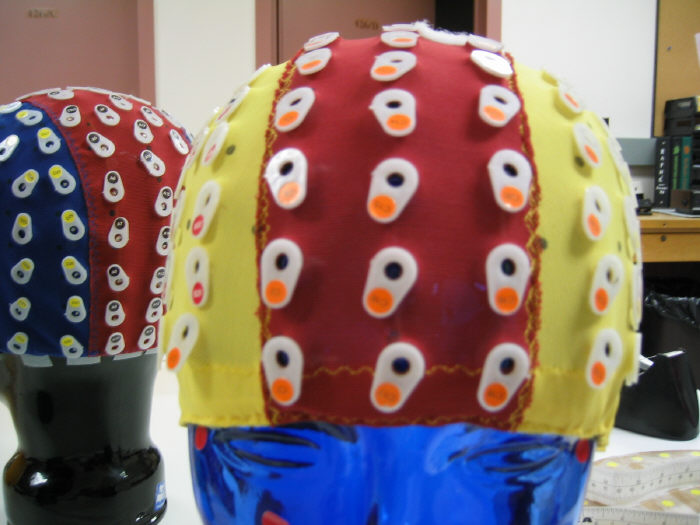
The following are photos from all sides (front, left, right, top, back) of each cap size. We did not do the extra large (brown) cap yet, it is gigantic and we are going to wait until we see that we actually need a cap that large -- it seems a bit extreme.There are some notes below the photos about how to place the tabs.
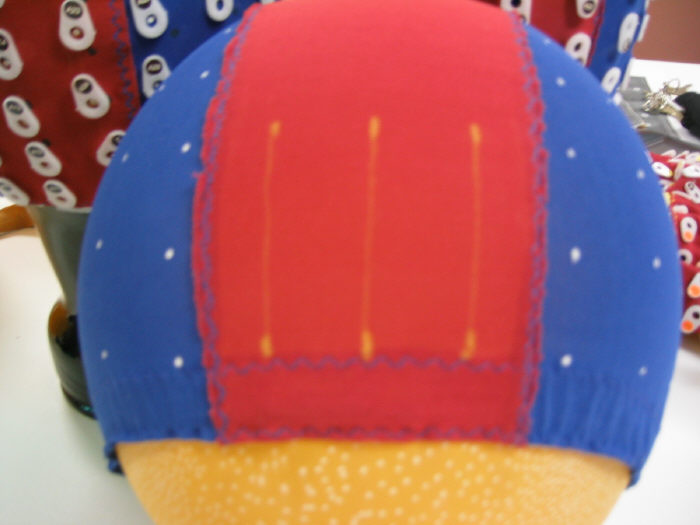
The red/yellow cap above has the C tabs (orange) pointing down, which is not ideal. Makes them harder to read when plugging in the electrodes.
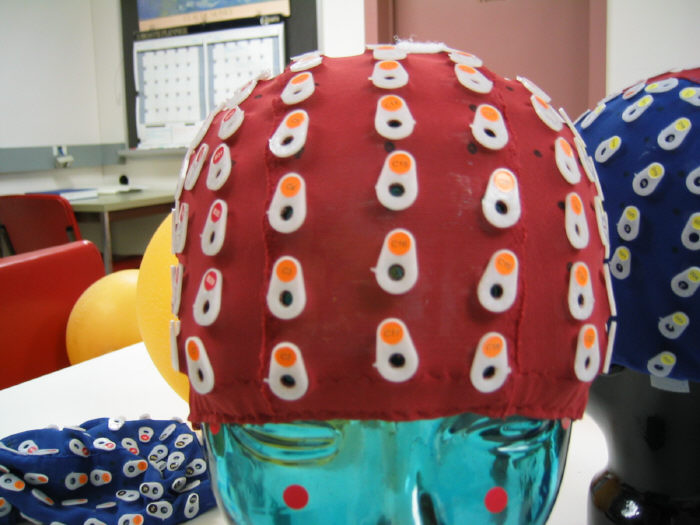
The red cap is much better, the C tabs are pointing UP. Easier to read when plugging in electrodes.
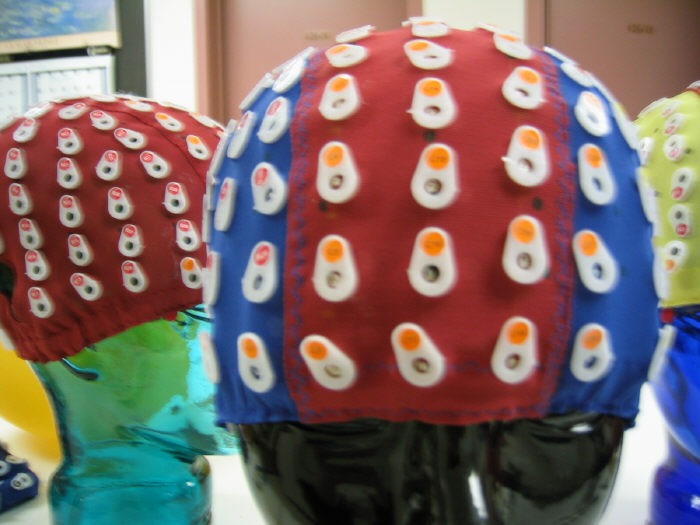
The blue/red cap is good for the C tab direction too.
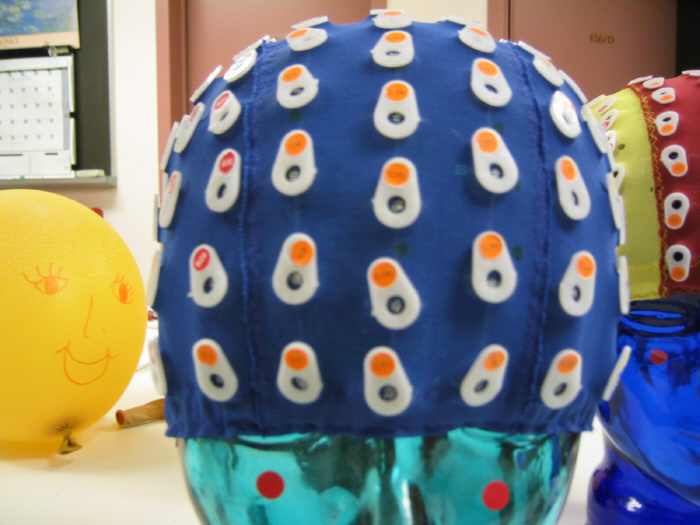
Ditto for the blue cap.
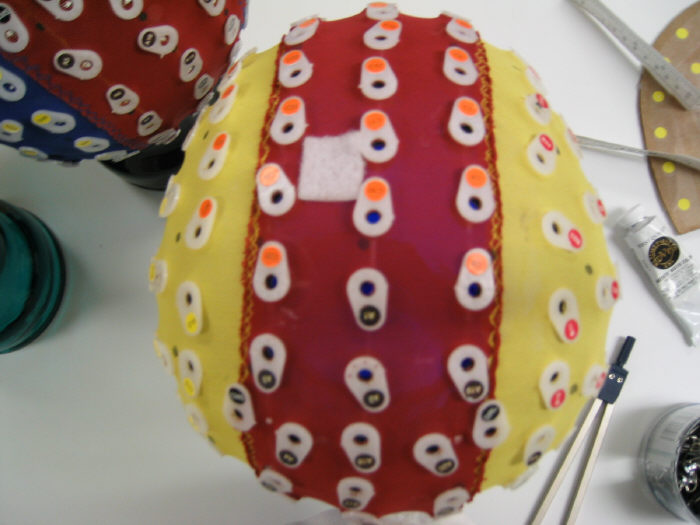
The red/yellow cap is really bad in terms of tab direction. C tabs (orange) should be pointing UP to top of head, A tabs (brown) should be pointing UP, B tabs (red) on right side and D tabs (yellow) on left side should be pointing UP.
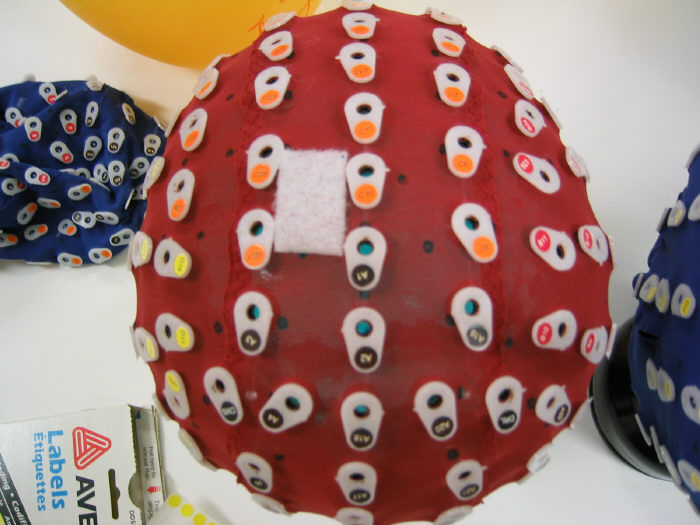
The red cap shows the C (orange) tabs pointing up. This is much better. BUT, notice the A tabs (brown) are pointing down; they should also be pointing UP toward the top of the head.

The blue/red cap is better, all 4 sets of tabs (front, back, sides) are pointing up.
The blue cap tab placement is very good. Unfortunately, the photo is a little blurry.
The A tabs (brown) on the yellow/red cap are pointing down - not ideal for plugging in electrode sets.
The A tabs (brown) on the red cap also pointing down. Not good.
The blue/red cap is better.
The blue cap is good.
Tabs point down - not as good.
Tabs point up - good.
Tabs point up - good.

Tabs point down - not as good.
Tabs point up - good.
Tabs point up - good.
The instructions above refer to Cap Release 4.0. For your interest, photos of Cap Release 3.0 are provided below.
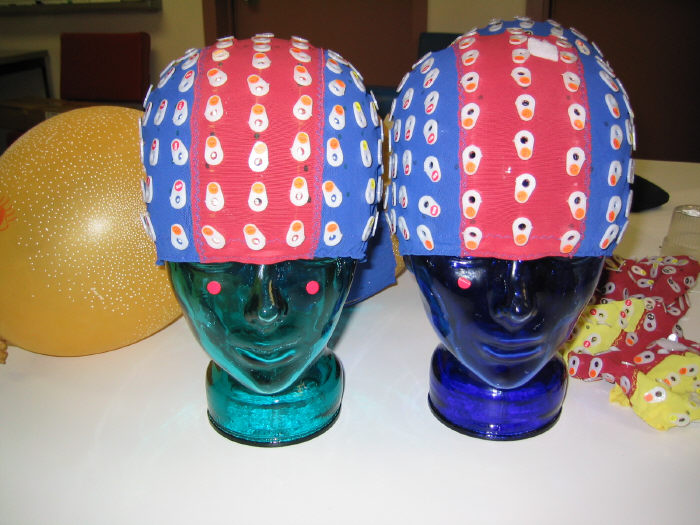
Compare current (left head) with previous (right head) placementsWe did not like the way the first template was designed because the distances across the top of the head were larger than the distances on the sides. The photos below compare the medium-large cap with electrodes placed according to Cap Release 3.0 (the blue glass head on the right) and Cap Release 4.0 (the green glass head on the left). You might be able to see that the new locations (left head) are more evenly distributed.
Current design is on the left. Note balloon in the background DOES have a face.
Current design is on the left.
Current design is on the left.

Current design is on the left.
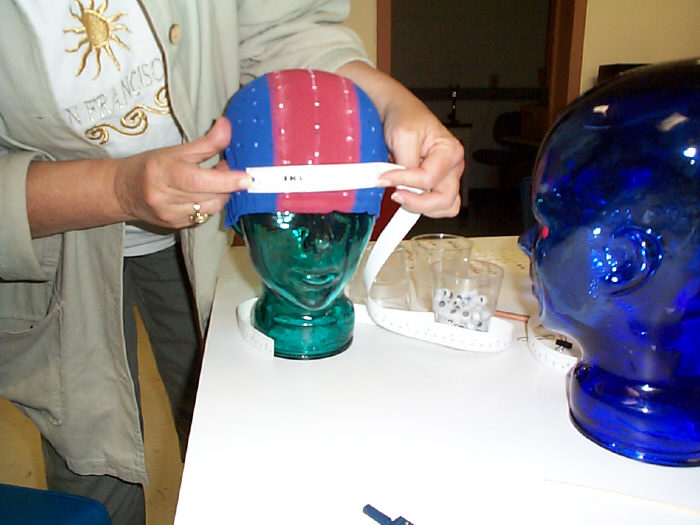
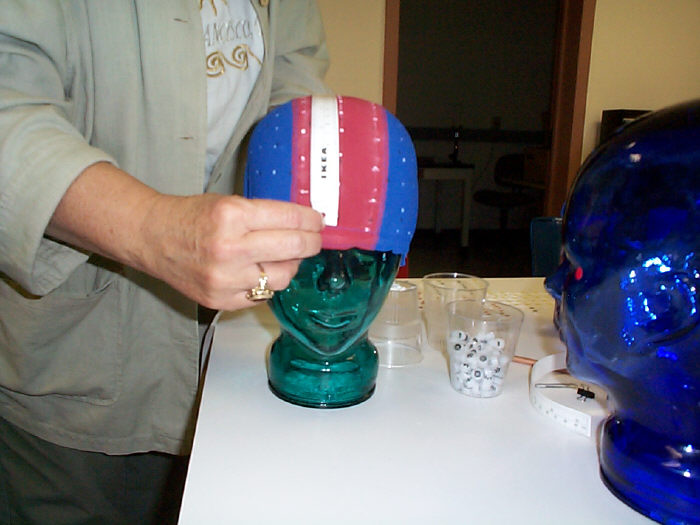
Do this last bit ONLY if you need velcro for digitizing:
You may not need to attach the velcro - this is used for caps that we are 3D digitizing. We used velcro in three places (top, left bottom seam, right bottom seam) to attach the Polhemus receivers during digitization. It works pretty well but you need to use some tape as well to take the tension off the cable so the receivers do not move.